Basic Use
Nature Lister is very easy to understand and easy use This page describes its basic use. We will cover all the screens in detail in specific pages about them.
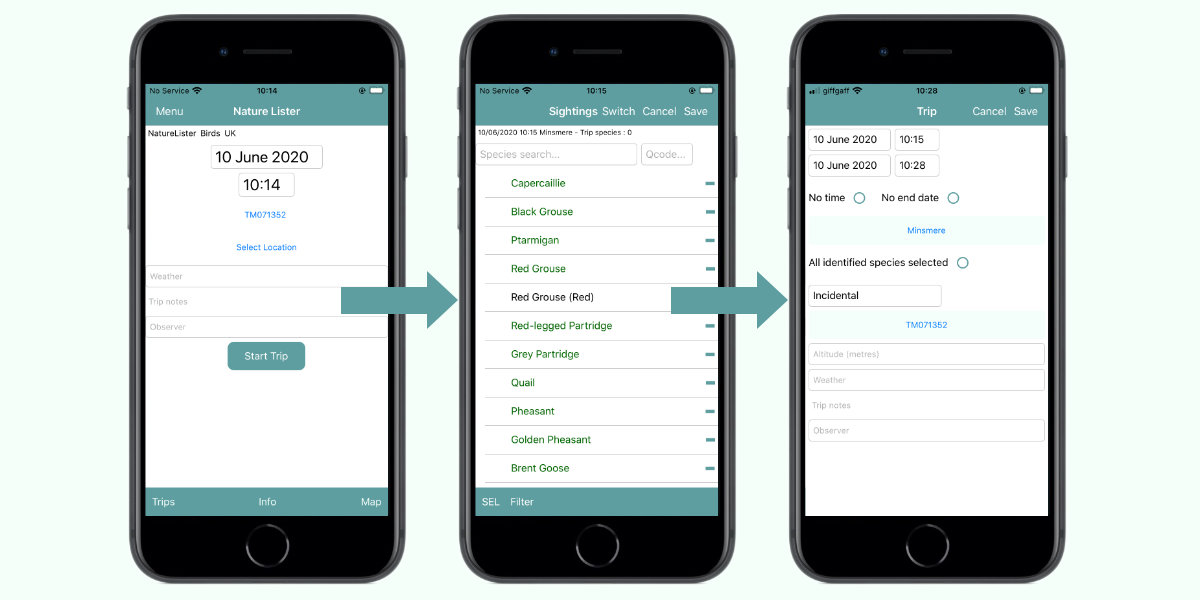
Once you have selected a workspace the trip entry screen appears.
Think of a trip as a date, time and location where you want to record some sightings.
The current date and time is entered for you, your smart device finds the Map location using its GPS from the current position.
You select a location from a list that shows the nearest sites and click Start Trip.
The Sightings screen will appear with a list all the species that you could see in the geographical area the selected workspace covers.
At the top of the list is the Search and Quick Code boxes where you can search the species name.
As soon as you start to type the list shown gets smaller until you can see the species you want.
Once you have found the species just tap the space before its name to increment the count of individuals seen. Tap again to increase the count by one.
If you add too many, just tap the minus to the right of the name to decrease the count.
Search for the next species and do the same again. You can add more to the count at any time.
Before you move to another location, just click the save button. Enter or edit any of your trip details and your sightings are saved ready for you to start your next trip.
Happy recording.

